
A newly installed casement can look clean while hiding a twisted frame, incomplete gasket contact, blocked drainage or weak perimeter sealing. By recording the system identity, measuring the opening, testing each component and tracing any leak to its first entry point, you can decide whether the fault belongs to the profile, fabrication, hardware, installation or building wall.
Key takeaways
- Record the profile system and measure the installed frame against its drawing and tolerance.
- Inspect sash alignment, seals, glazing beads, hardware and drainage paths inside and outside.
- Test opening, locking, drainage and weather performance before blaming the profile.
- Check the perimeter joint for movement, failed sealant and Chennai’s heat, rain and humidity.
Confirm the System and Measure the Installed Frame
Before calling an installation failed, record the system and measure the installed frame against the manufacturer’s drawing and installation tolerance. To assess casement for uPVC profiles after installation in Chennai, document:
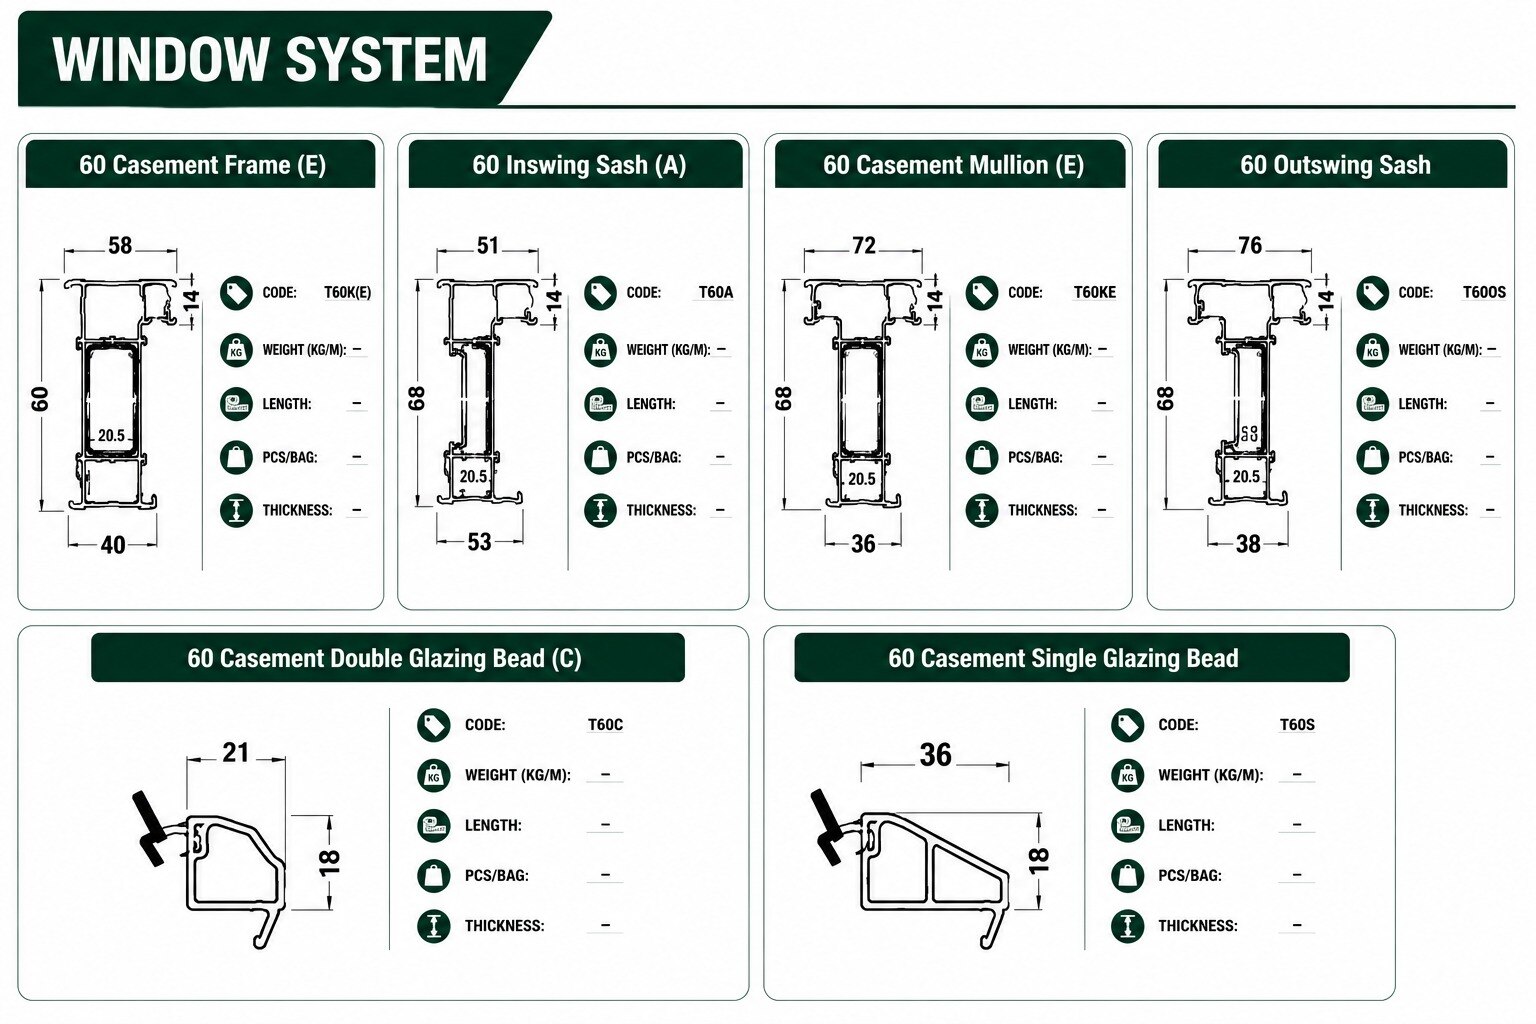
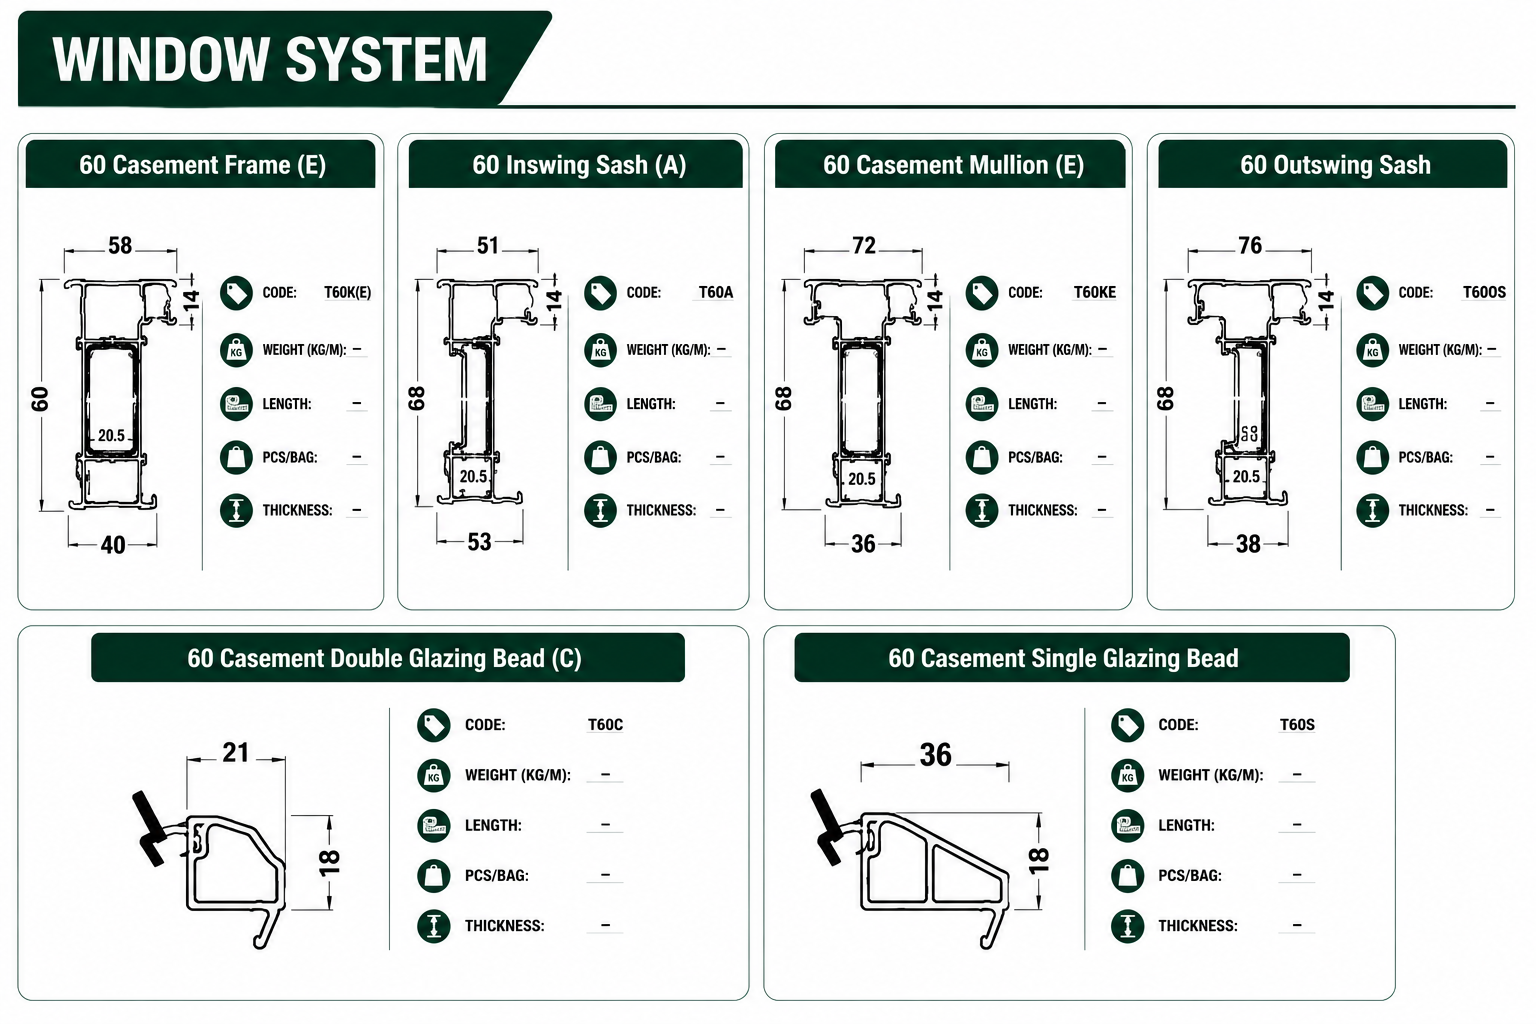
1. Record the series name, profile codes, frame and sash depths, reinforcement specification, glazing thickness, gasket type, hardware, installation date, elevation and exposure. Confirm what “60 Casement Series” means: the manufacturer’s section drawing must show whether its 60 mm dimension refers to the frame, sash or another profile.
2. Measure the finished frame width and height at several points, both diagonals, and the perimeter gap between frame and masonry. Check plumb, level, square and twist with a spirit level, tape and straightedge across the frame and sill.
3. Record sash-to-frame gaps, reveal consistency, visible gasket compression and the sash’s closed position. Compare every result with the system’s installation specification; do not apply a generic millimetre tolerance.
4. Photograph each elevation, corner, sill, anchor position and visible defect before adjustment. Note windward exposure, coastal salt, dust, heat and recent rain so later water or movement evidence has context.
5. Confirm that sill channels, internal drainage chambers and external weep holes are open, connected and free of sealant. Mark the first point of water entry during testing; leakage through the sash, sill corner or outer frame indicates different causes and must not be grouped as one failure.
Inspect the 60 Casement Series Assembly Inside and Outside
Inspect the 60 Casement Series as an assembly from both faces: a sound uPVC extrusion does not rule out a distorted sash, loose anchor or failed seal. For a 60 casement series inspection, examine these parts without relying on appearance alone:
- Frame and sash profiles: check straightness, level, plumb, consistent reveals, impact marks and any bowing.
- Welded or mechanically joined corners: look for open joints, cracks, flashing, gaps and displaced end caps.
- Reinforcement and fixings: inspect visible screw positions, anchor heads and signs that steel reinforcement is missing, loose or corroded.
- Glazing: confirm glass is clear of the frame, beads and reinforcement; check seated setting blocks, fully engaged beads and an undamaged edge seal.
- Gaskets: trace the full gasket length for cuts, gaps, shrinkage, flattening or loss of elasticity.
- Hardware: inspect handles, hinges, friction stays, locks, restrictors, screws and locking keeps for looseness, distortion or missing covers.
| Position | Inspect | Warning sign |
|---|---|---|
| Inside | Sash gasket, handle, hinges, stays and locking keeps | Uneven compression, loose hardware or a handle sitting off-square |
| Outside | Frame corners, glazing beads, sill, drainage outlets and end caps | Open weld, displaced bead, blocked outlet or standing water |
| Glass edge | Packing, bead engagement and edge seal | Glass touching PVC-U, reinforcement or a bead |
Do not add drainage holes or remove gaskets as a field fix; both changes can undermine the designed weather path.
Test Movement, Locking, Drainage and Weather Performance
Prove movement and weather performance separately. Open the sash through its full travel, then close it without rubbing, binding or excessive force. Turn the handle only after the sash meets the frame; every locking point must engage, and the handle must not stop short.
Do not tighten every cam to cure a leak: excessive compression damages gaskets and makes operation harder.
- Check that visible gasket compression is continuous around the sash.
- Confirm hinges, friction stays and restrictors move without looseness or distortion.
- Clear the sill drainage path and external weep holes; verify that internal chambers discharge through them.
- Run a controlled hose test while observing the first water entry. Keep sealant away from weep outlets, end dams and corner joints.
- Use a smoke pencil or local pressure test for air paths. ASTM E783 provides formal air-leakage measurement, while a hose test locates water entry but does not prove rated water resistance.
- For formal water testing, use ASTM E1105 or the project standard. The result applies only to the tested specimen and setup.
Classify the leak before correcting it, then retest after one change.
| Location | First suspicion | Check |
|---|---|---|
| Sash perimeter | Gasket, glazing or lock compression | Smoke test and inspect gasket continuity |
| Sill or corners | Drainage, end dam or corner seal | Trace water to the first entry point |
| Outer frame | Perimeter sealant or masonry movement | Test the frame-to-wall joint separately |
Photograph the closed window and mark the entry point; indiscriminate sealant can hide the real failure.
Examine the Perimeter Joint for Chennai Site Conditions
Treat the frame-to-wall joint as a separate assembly, not as part of the uPVC casement profiles in Chennai. Inspect the inner seal, outer weather seal, backer material, sill end dams, anchors and masonry reveal for gaps, cracking, debonding or uneven compression. A sound frame can still leak when the perimeter seal fails.
- Photograph every elevation, then record whether the defect appears after wind-driven rain, ordinary rain, or no rain.
- Check the outer seal for open corners, pinholes, hardening, bubbles and separation from PVC-U, plaster or concrete. Do not smear sealant across sill drainage outlets.
- Run a controlled hose test from the lowest joint upward, using one area at a time. Water at the frame edge indicates a perimeter or sill-interface path; water from the sill weep hole indicates internal drainage reaching its outlet.
- Compare the frame gap, reveal and sealant width around all four sides. Measure plumb, level, both diagonals and twist with a straightedge; compare results with the system installation specification, not a generic tolerance.
- Inspect salt deposits, traffic dust and construction grit at the seal. Rinse with clean water and mild detergent, then dry; abrasive powders and solvents can damage seals and finishes.
- Look for sun-baked sealant, damp staining, mould and interior condensation. Condensation on the room-side reveal points to a cold bridge or high indoor humidity, while rain staining points to water entry.
Wind pressure and thermal movement expose a joint that looks sound in dry weather. Repair only after identifying the first entry point, and retest after one correction.
Maintain the Window and Identify the Real Cause of Failure
Clean exposed profiles, gaskets, sills and hardware with clean water and mild, non-abrasive detergent. Rinse and dry them; coastal elevations, balconies and dusty sites need more frequent washing. Avoid abrasive powder, blades, strong solvents, unapproved paint removers and adhesive removers, which can dull PVC-U, swell seals or damage hardware finishes.
Use these casement profile maintenance checks:
- Clear sill drainage paths and external weep holes without drilling new holes.
- Check gasket continuity, elasticity and corner welds for splits or separation.
- Confirm glazing beads remain fully seated and setting blocks have not shifted.
- Tighten loose hardware only, and lubricate hinges, friction stays and locks with the hardware maker’s specified lubricant.
Run casement window system checks before ordering parts. If the sash rubs, the handle stops early or locking points miss, inspect hinge adjustment, sash diagonals, glazing packers and reinforcement. Glass touching the frame, missing setting blocks or a damaged edge seal points to incorrect glazing, not a faulty profile.
Classify the remedy by the evidence:
- Adjustment: gaps or locking alignment vary, but the frame is level, plumb and secure.
- Repair: replace a gasket, handle, friction stay, lock, bead or damaged sealant while the frame and anchors remain sound.
- Replacement parts: use the recorded hardware and profile codes; confirm the manufacturer’s section drawing before ordering a “60” component. LUMIA UPVC PROFILE documentation should confirm whether 60 mm describes the frame, sash or another section.
- Reinstallation: choose this when anchors are loose, the frame is out of square, drainage is blocked by the joint, or water bypasses the sill or wall interface.
Related product
 | Casement Series The 60 Casement Series by Lumia uPVC Profile is designed to deliver exceptional durability, energy efficiency, and modern aesthetics for contemporary... View product → |
Frequently asked questions
What should you confirm before assessing an installed uPVC casement window?
Record the profile system, then measure the installed frame against the manufacturer’s drawing and stated installation tolerance.
How do you inspect a 60 Casement Series assembly?
Inspect the frame, sash, glazing beads, seals, hardware and visible joints from both the interior and exterior sides.
Which casement window system checks should you perform after installation?
Test sash movement, handle operation, locking engagement, drainage paths and resistance to air or water entry.
What should you examine around the window perimeter in Chennai?
Check the perimeter joint for gaps, failed sealant, movement and site-condition effects from heat, rain and humidity.